
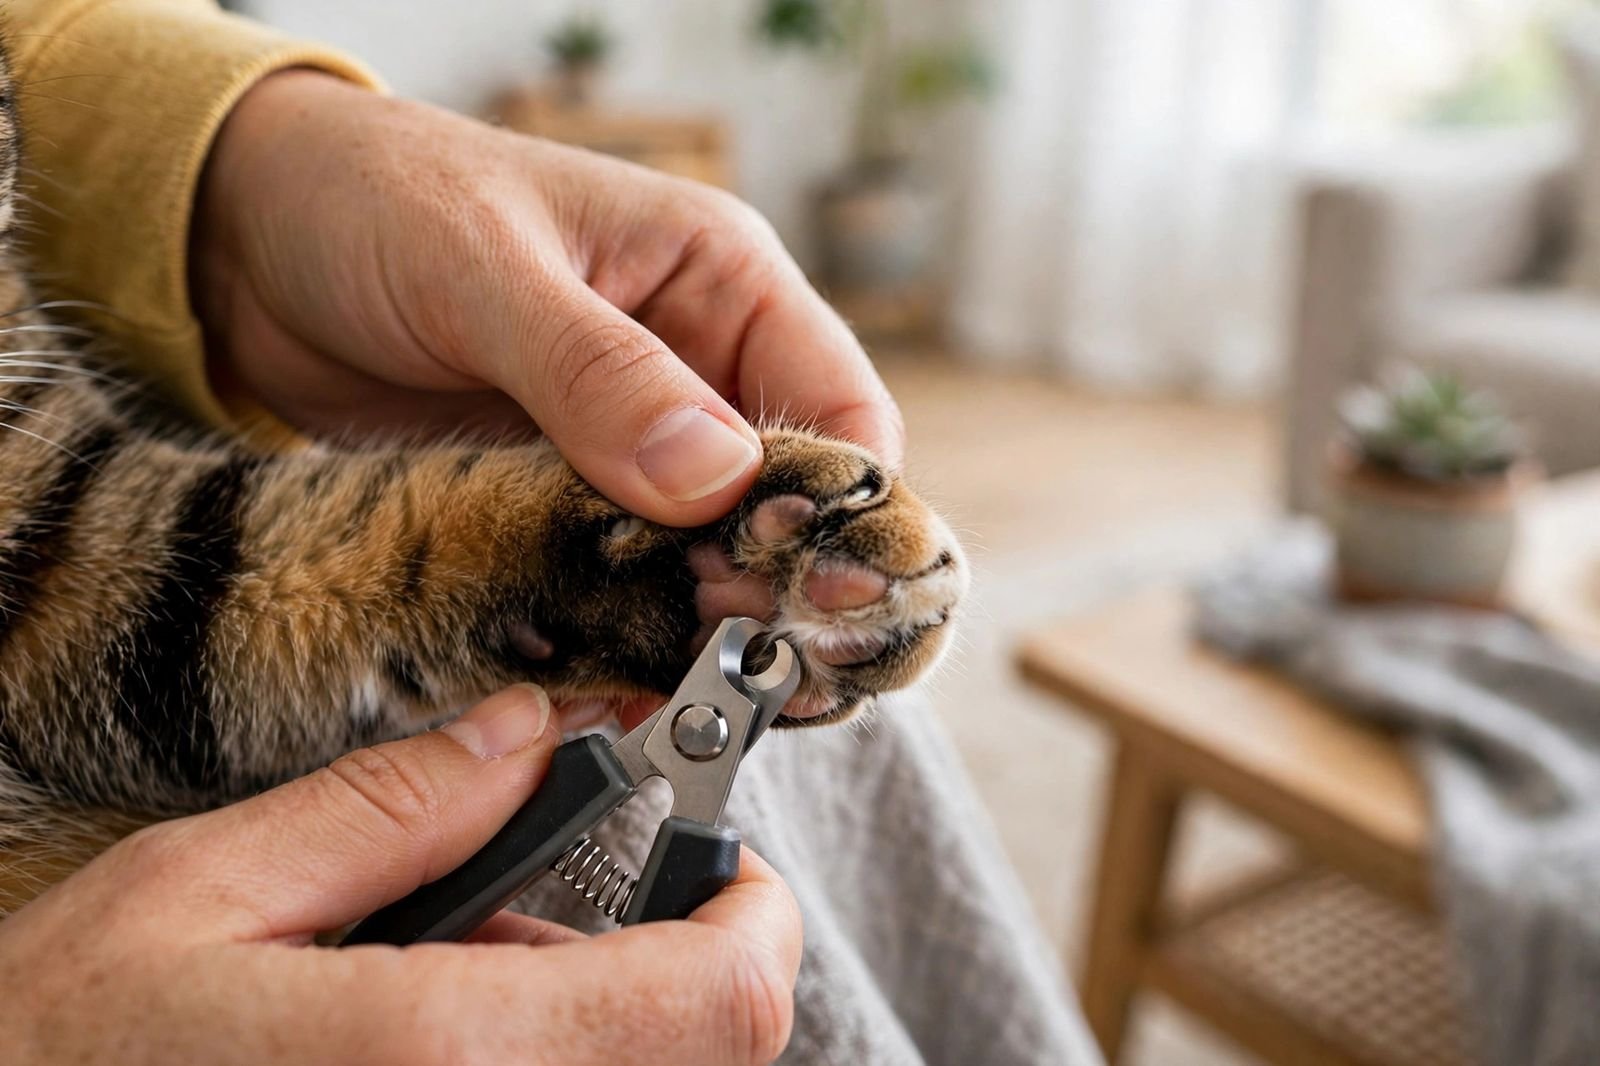

How to Trim Your Cat’s Nails Without a Fight
Most first attempts at trimming a cat’s nails go something like this: wait until the cat is asleep, creep up with the clippers, manage exactly one nail — and then the cat wakes up, gives you a look of profound betrayal, and hides under the bed for hours. It is tempting to approach the whole thing like a heist. But there is a much better way — one that does not involve stealth, ambushes, or damaged trust.
Learning how to trim your cat’s nails without a wrestling match is one of those small skills that pays off for years. Trimmed nails mean less snagging on furniture and fabrics, fewer accidental scratches on you, and — most importantly — nails that do not grow so long they curl into the paw pads, which is genuinely painful. Here is the calm, step-by-step method that actually works, including what to do when your cat wants no part of it.
Published: May 28, 2026 | Last updated: May 28, 2026
Quick Tips
- Trim only the sharp tip — never cut into the pink “quick” inside the nail.
- Use proper cat nail clippers; human clippers can crush the nail.
- Trim when your cat is sleepy and relaxed, never mid-zoomies.
- One or two nails per session is a perfectly fine pace when starting out.
- Pair every step with treats so nail trims predict good things.
- If your cat panics, stop. Forcing it teaches the cat that trims are scary.
Why Trimming Matters (It Is Not Just About Your Furniture)
Most people start thinking about nail trims because of scratched-up sofas. Fair enough — but the real reasons are about the cat. Indoor cats do not wear their nails down the way outdoor cats do on rough surfaces, so the nails keep growing. Left too long, they snag on everything, and in extreme cases they curl right around into the paw pad — painful, and prone to infection. Regular trims prevent all of it.
There is a human-safety angle too. Long, razor-sharp nails turn ordinary play into accidental scratches, and cat scratches can get infected. Blunt nails make cuddle time safer for everyone, including kids. Trimming does not stop scratching behavior, though — that is a separate need, and a good scratching setup is still essential.
How often? For most indoor cats, every 2–4 weeks. Senior cats often need more frequent trims because their nails thicken and they scratch less. If you are ever unsure whether a nail is too long, your vet or groomer can show you in thirty seconds at your next visit.
Get the Right Tools
You do not need much, but the right tool matters more here than in most grooming tasks.
Cat nail clippers. Scissor-style (small curved blades, like tiny scissors) are the easiest for beginners — good visibility, good control. Guillotine-style works fine too once you are used to it. Skip human nail clippers: they are shaped wrong for a cat’s curved nail and can crush or split it instead of cutting cleanly.
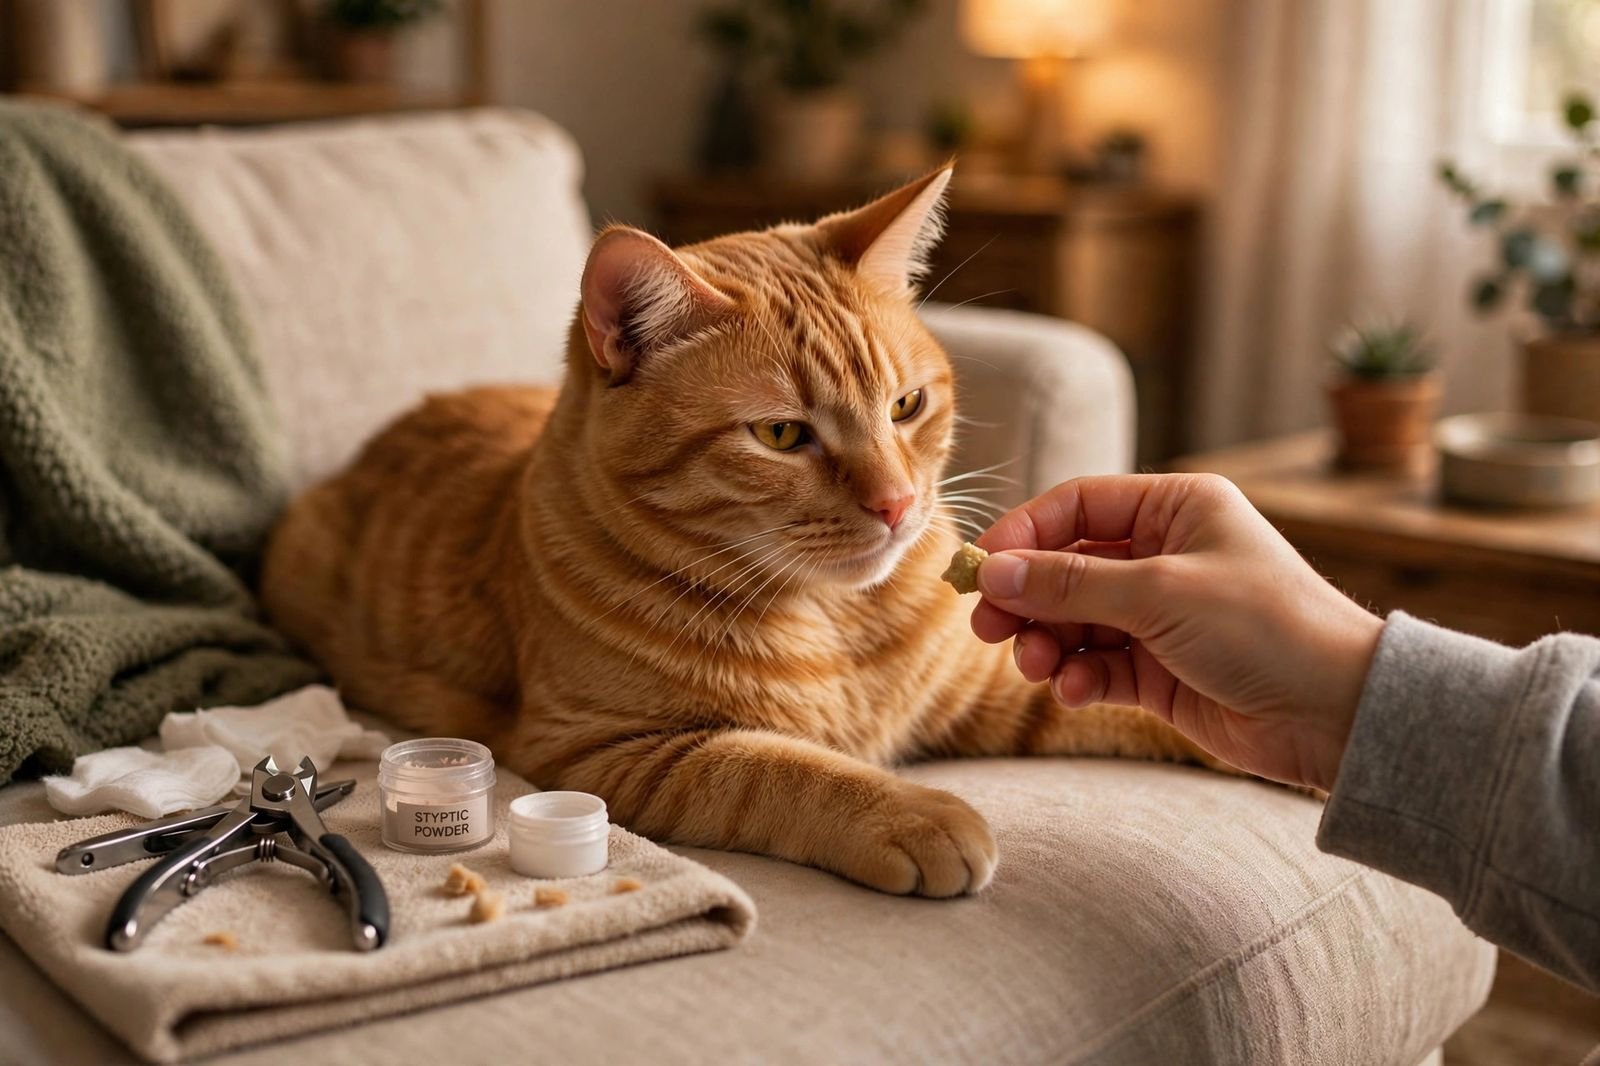
Styptic powder. Your safety net. If you ever nick the quick, a pinch pressed onto the nail tip stops the bleeding fast. Keep it within arm’s reach every time you trim — not in another room. You probably will not need it, but the one time you do, you will be glad it is there.
Treats. Small, high-value ones — the good stuff, not everyday kibble. Not optional. They are the entire training strategy.
Good lighting matters as much as any tool — trim near a window or under a bright lamp. On light nails you can see the pink quick through the nail; on dark nails you cannot, so trim in smaller, more conservative snips. If dark nails make you nervous, ask your vet or groomer to demonstrate on one paw first.
Know the Anatomy: Find the Quick
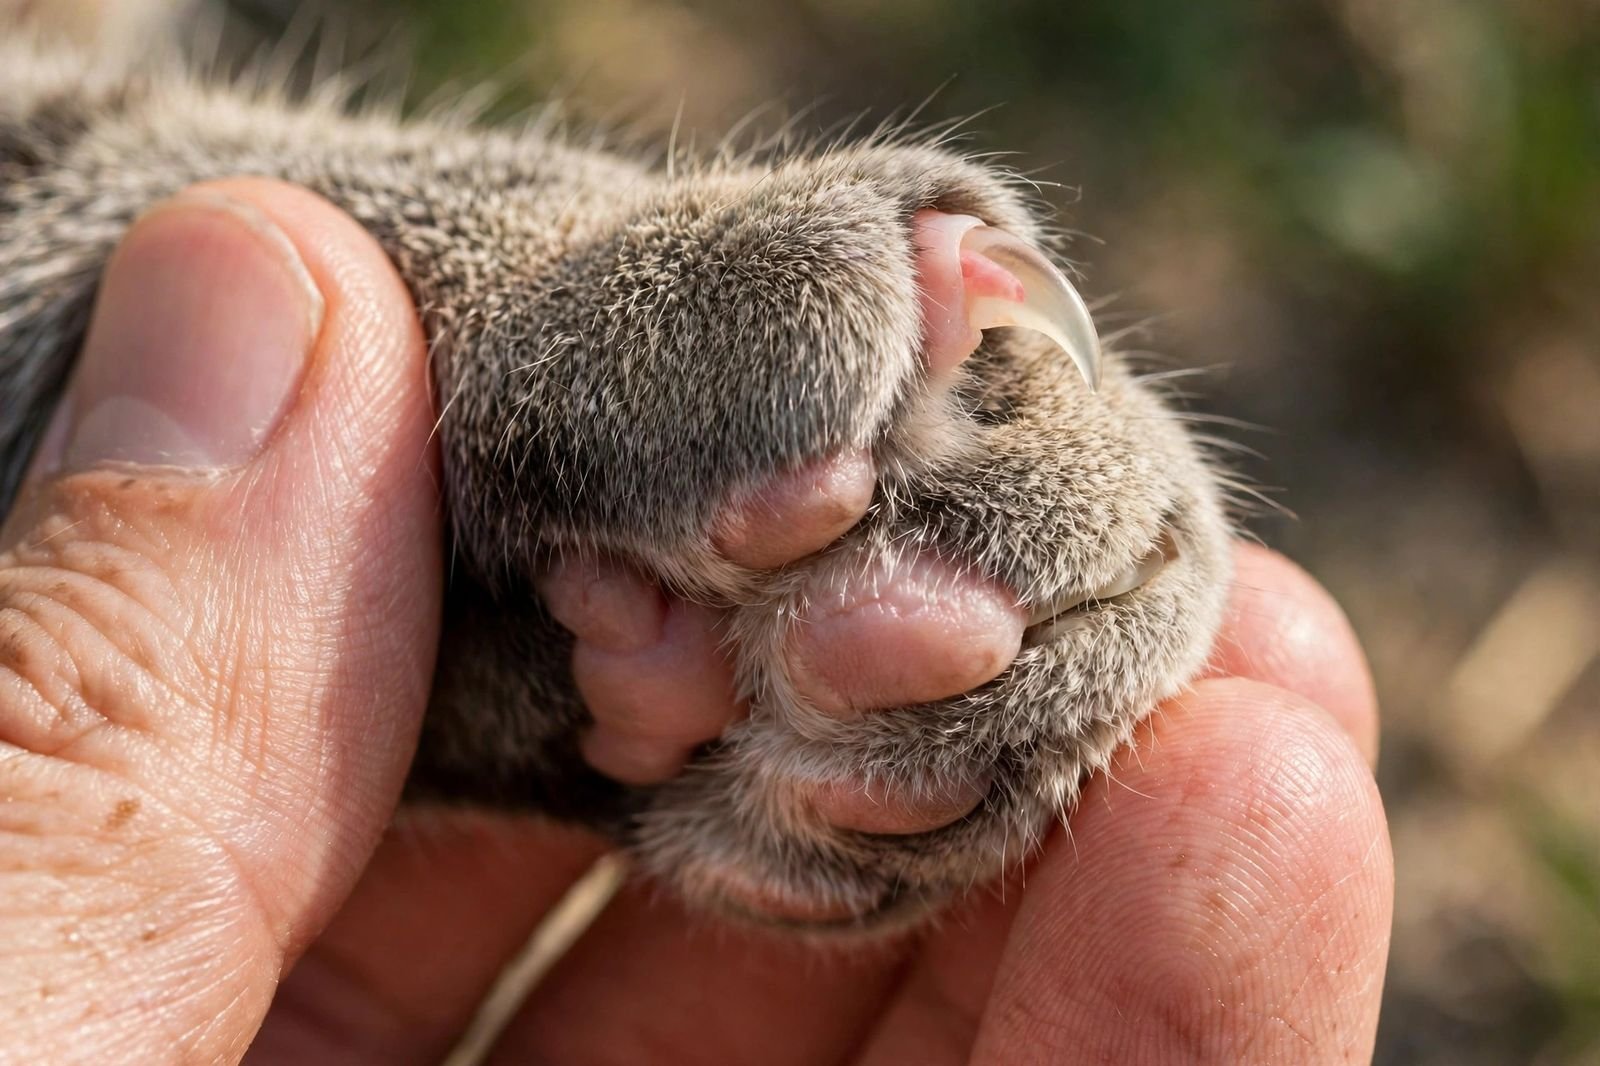
Thirty seconds of anatomy makes everything else click. A cat’s nail has two parts: the hard outer shell (dead, no feeling, safe to cut) and the quick inside (living tissue with blood vessels and nerves — do not cut this). On light nails, the quick is visible as the pink triangle inside the nail. Your job is to cut only the curved, translucent tip beyond it.
The safe zone is smaller than beginners expect — usually just the last 2–3 millimeters, the sharp hook at the end. When in doubt, cut less. You can always take a bit more off next week; you cannot put nail back on. This conservative approach is especially important with dark nails, where you trim tiny slivers and stop at the first sign of a darker dot in the center of the cut surface, which means you are approaching the quick.
One more anatomical note: cats have a fifth nail on each front paw, the dewclaw, sitting higher up on the inner leg. It does not touch the ground, so it never wears down on its own, and owners forget it constantly. Check the dewclaws every trim — they are the most likely nails to overgrow and curl.
The Step-by-Step: Trimming Without Drama
Here is the method. The secret is that most of the work happens before the clippers come out.
Step 1: Pick the right moment. A sleepy, relaxed cat — post-nap, post-meal, loafing in a sunbeam — is ten times easier than an alert one. Never attempt trims in play mode, and never chase a cat to start. If the cat walks away, let it go. There is always later.
Step 2: Get comfortable together. Sit with the cat in your lap or beside you, the way you normally cuddle. Pet, talk calmly, let the cat settle. Offer a treat for hanging out. You are building the association: this situation means good things.
Step 3: Handle the paws. Gently take one paw and press the pad lightly to extend the claws. Touch each nail, then treat. Do this for a few sessions before you ever cut anything if your cat is new to paw handling — desensitizing the touch separately from the clipping is what separates peaceful trims from battles. My cat brushing guide uses the same gradual approach for grooming.
Step 4: Trim one nail. With the claw extended, position the clippers on the curved tip, well clear of the quick, and make one confident cut — hesitant half-squeezes crush more than they cut. Treat immediately, like the cat just won the lottery.
Step 5: Stop while you are ahead. For the first several sessions, one to three nails is a complete victory. Put the clippers down, give a final treat, and let the cat go be a cat. Within a few weeks, most cats will sit through all ten front nails in one calm session, because the ritual has come to mean treats and gentle handling.
The back nails grow slower and stay blunter — check them monthly and trim the obvious hooks.
When Your Cat Wants No Part of It
Some cats, despite your best gradual work, simply will not tolerate nail trims at home. That is okay. It is not a failure, and it is not a training emergency. Here is the escalation ladder:
Slow down further. Go back to just paw-touching with treats for a week, then one nail. Some cats need the process stretched over a month — slow progress that holds beats fast progress that collapses.
Try a different position or time. Some cats hate laps but tolerate trims lying on their side. Some do better with a helper — one person holds and treats, the other clips. And the deep-sleep window after a meal or play session is prime time; a drowsy cat may let you do several nails before deciding it has opinions.
Outsource it. Zero shame in having the vet tech or groomer do it. It is quick, inexpensive, and the cat blames the stranger instead of you. Many owners do a hybrid: professional trims most of the time, home touch-ups when the cat is cooperative. If your cat is new and everything is still a negotiation, my new cat guide has broader advice on building trust early, which makes every handling task easier.
What not to do: do not towel-wrap and force it, do not punish struggling, and do not chase. Every forced trim makes the next one harder. You only get a cooperative cat through the cat’s consent, however grudging.
What If You Cut the Quick?
It happens to everyone eventually — even groomers. The cat yelps, the nail bleeds, and your stomach drops. Here is the reality: it looks dramatic and it is not dangerous. The quick bleeds freely because it is vascular, which is alarming, but a nicked quick is a minor injury, like cutting your own nail too short.
Stay calm — your reaction sets the tone. Press a pinch of styptic powder onto the nail tip and hold gentle pressure for a few seconds. The bleeding should stop quickly. If you do not have styptic powder, a clean cloth with firm gentle pressure works; cornstarch in a pinch. Do not continue trimming that session — end on a treat and try again another day. The cat will remember the pain briefly, but one calm, well-handled incident does not ruin the whole program. What ruins it is panicking, which teaches the cat that trims are emergencies.
If bleeding does not stop after several minutes of pressure, or the nail looks damaged beyond a simple nick, call your vet. That is uncommon, but it is the line between “oops” and “needs a professional look.”
Frequently Asked Questions
How often should I trim my cat’s nails?
Every 2–4 weeks for most indoor cats; seniors may need it more often. Check the dewclaws every time — they never wear down on their own.
Can I use human nail clippers on my cat?
Not recommended. They are shaped for flat human nails and can crush or split a cat’s curved nail. Proper cat clippers — scissor-style is easiest for beginners — are inexpensive and safer.
Do I need to trim the back claws too?
Yes, but less often. Back nails grow slower and stay blunter. Check them monthly and trim the obvious hooks — do not skip them entirely.
My cat hates having its paws touched. What do I do?
Desensitize paw-touching separately from clipping. For a week or two, just touch paws and press pads gently during cuddle time, treating each time — no clippers in sight. Once the cat is bored by paw handling, introduce the clippers.
Is it okay to just have the vet do it?
Absolutely. Vet techs and groomers do this all day; it is quick and inexpensive, and many owners never trim at home. A hybrid approach works well too — professional trims mostly, home touch-ups when the cat cooperates.
What about nail caps?
Soft plastic caps glued over the claws reduce scratching damage, but they fall off as nails grow and need replacing every few weeks. They do not replace trimming — the nails underneath still grow. A supplement to scratching and trimming, not a substitute.
[…] surface, claws can grow thick, catch on fabric, and even curl painfully. This is also why regular nail trims matter: trimmed claws do far less damage even when the cat does scratch the wrong […]